![Untitled design (2)-3.png]](https://support.helloalleva.com/hs-fs/hubfs/Untitled%20design%20(2)-3.png?height=50&name=Untitled%20design%20(2)-3.png)
Release Notes - 6/4/19
PrintAlleva Release Notes – June 4, 2019
We are always improving Alleva. As such, we would like to share the following list of items which were released on June 4, 2019 at 1:30 AM PDT.
Please note! The system was down for 90 minutes at that time.
Please Clear Your Browser Cache
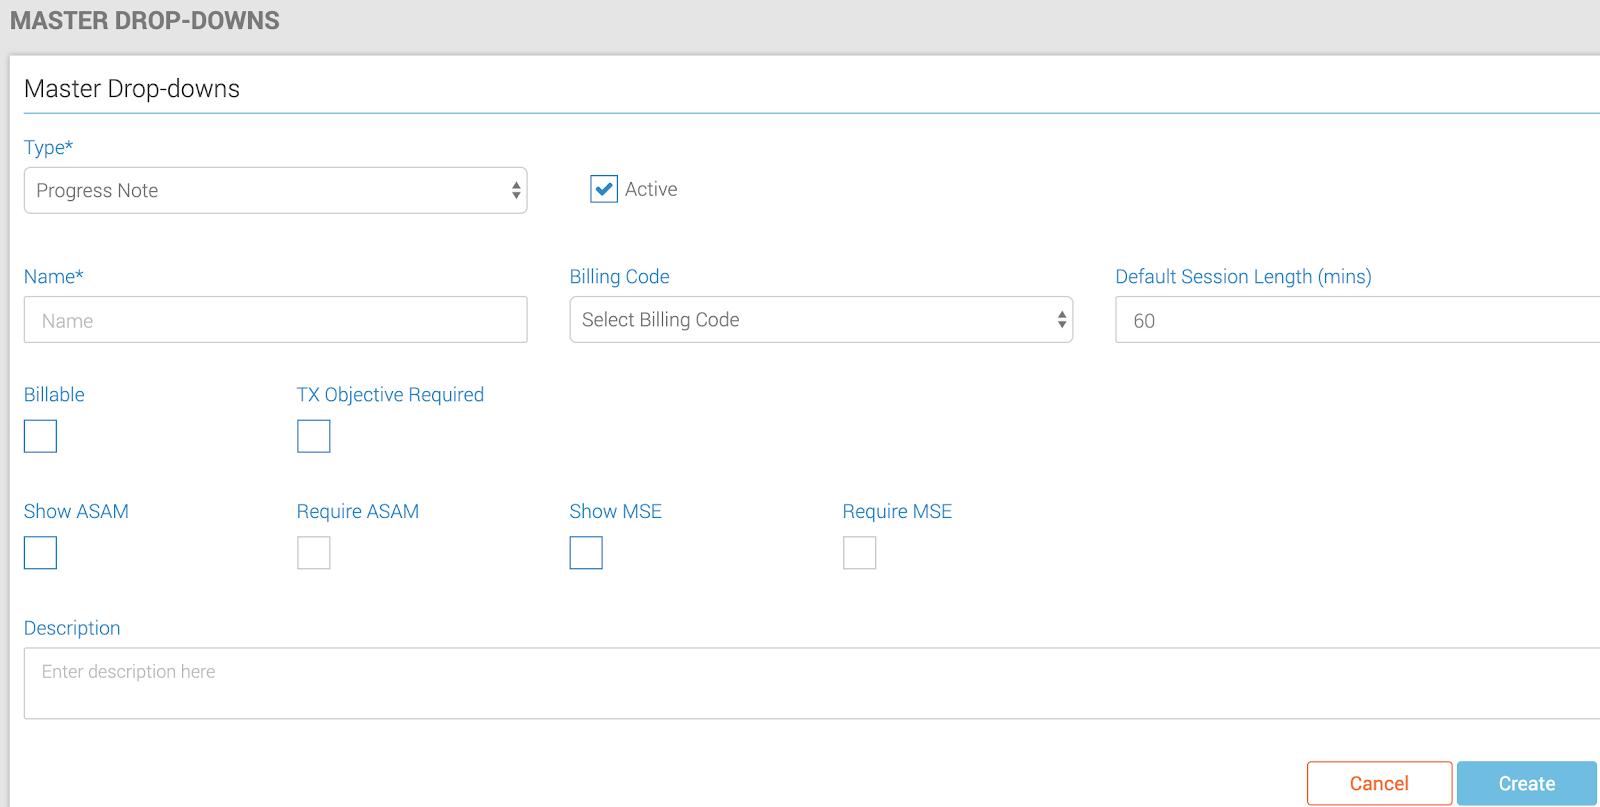
Progress Note reformat and creation - This constitutes a fundamental shift in how Progress Notes and Individual Sessions are created in the Alleva system. We’ve now combined the workflow of how both notes work. To fully utilize this function you will be required to do set up. This setup is managed under Settings > Master Dropdowns > Progress Notes. Below are the correct steps in setting up this new function:
Click + Add
Give the Note Type a name (this will be what shows when you filter for not types and is tied to the session type.
Select a Billing Code (this is not required, but will pre-populate each time you select the note type
Define a Default Session Length - This will determine how long the session will be by default, each time you select the Note Type. By default, this will be 60 minutes.
Define if Billable or not. This is a critical step. If a note type is billable it will appear on the calendar as an Individual Session and will flow through to the Ready to Bill screen. If a note is not checked as billable it is a Progress Note, it will not show on the calendar.
Define whether adding Tx Plan Objectives are required or not. If not, then you will not to fill them out while completing the note.
Define whether you want the ASAM or MSE to show and be required for a note as well.
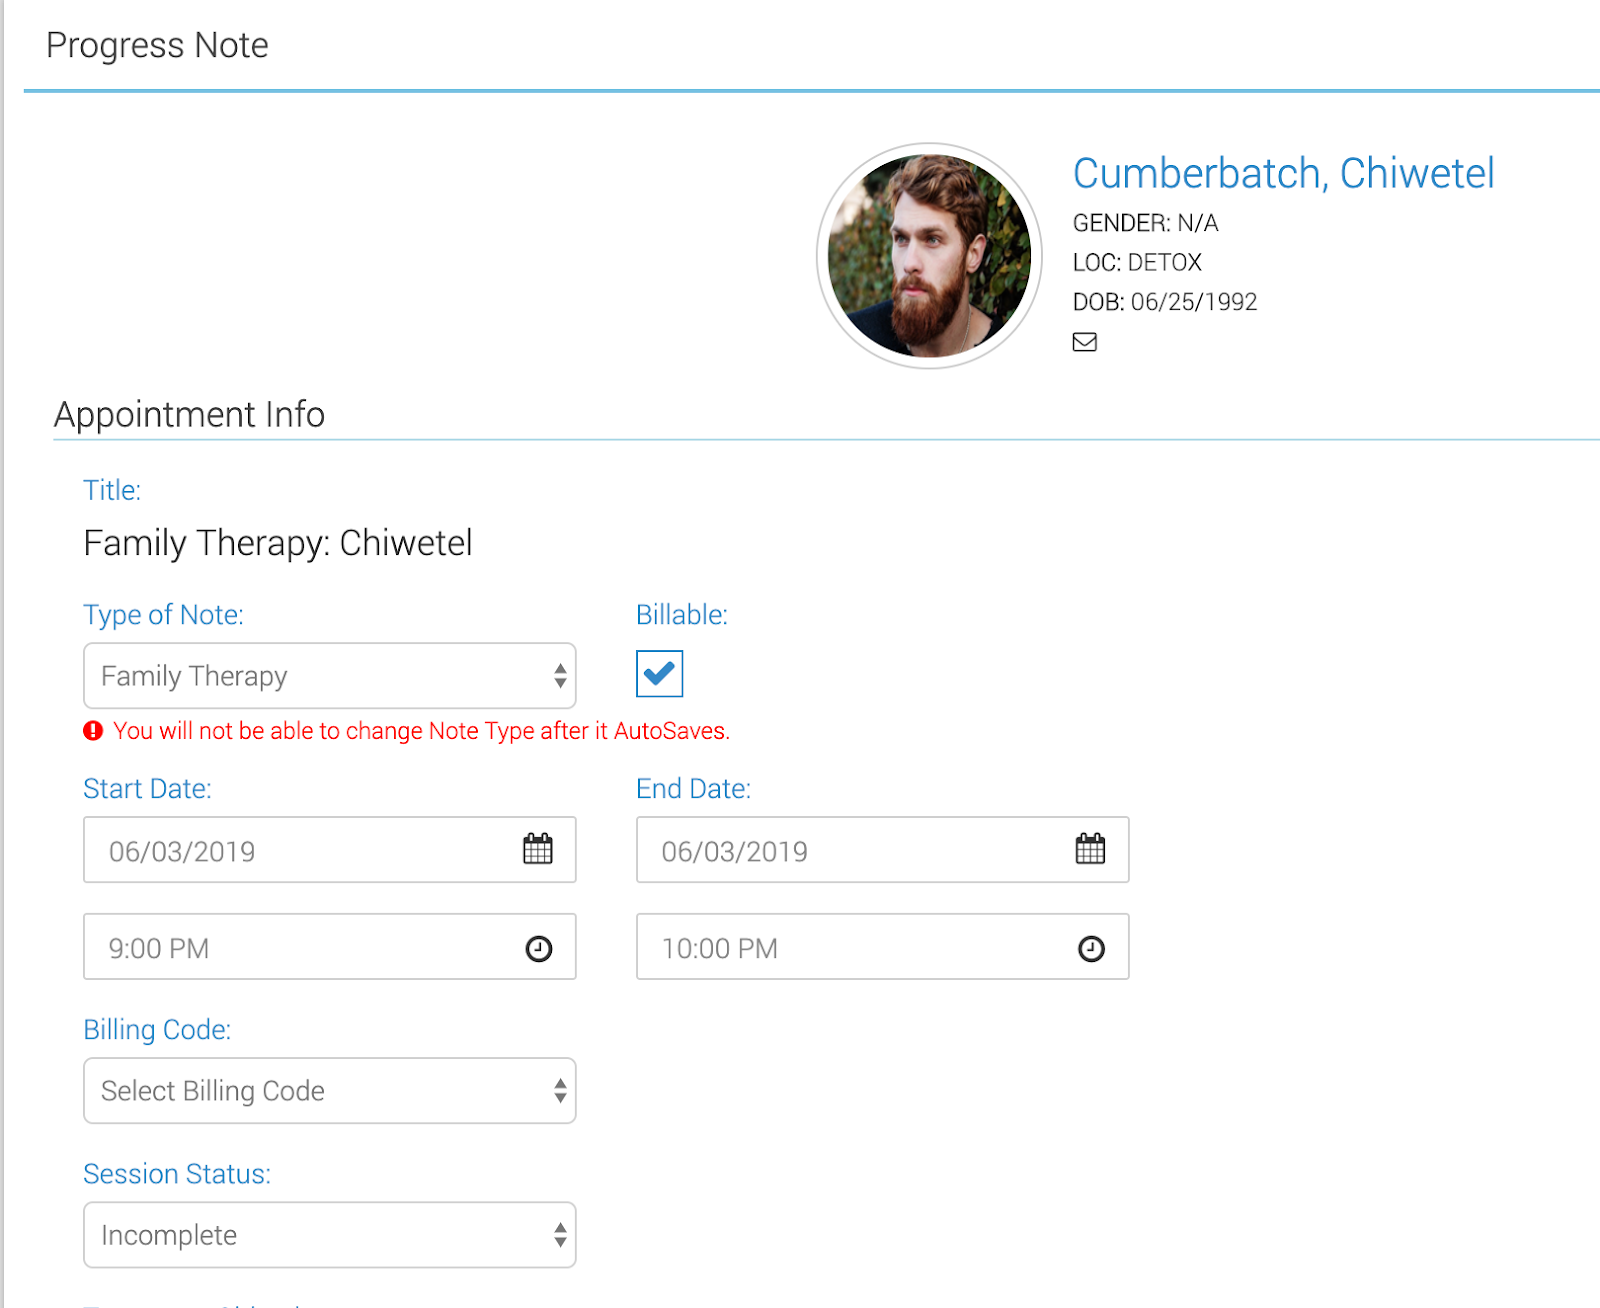
To best leverage this functionality you will then want to go to the Alleva Shortcuts menu. Hover over the plus sign and select the Progress Notes option. You will then be able to select who the note is for and start creating the note.
Please ensure you select the proper note type. Once a note type is selected and the first auto-save occurs, you will not be able to change the note type. If you’ve made a mistake, go back to the shortcuts to create a new note.
Treatment Plan Review - TPR now features the ability to customize and/or reorder sections. This format is similar to that of the intake process. It gives you the flexibility to tailor your TPR review to fit your needs. You can now delete a TPR that may have been created in error.
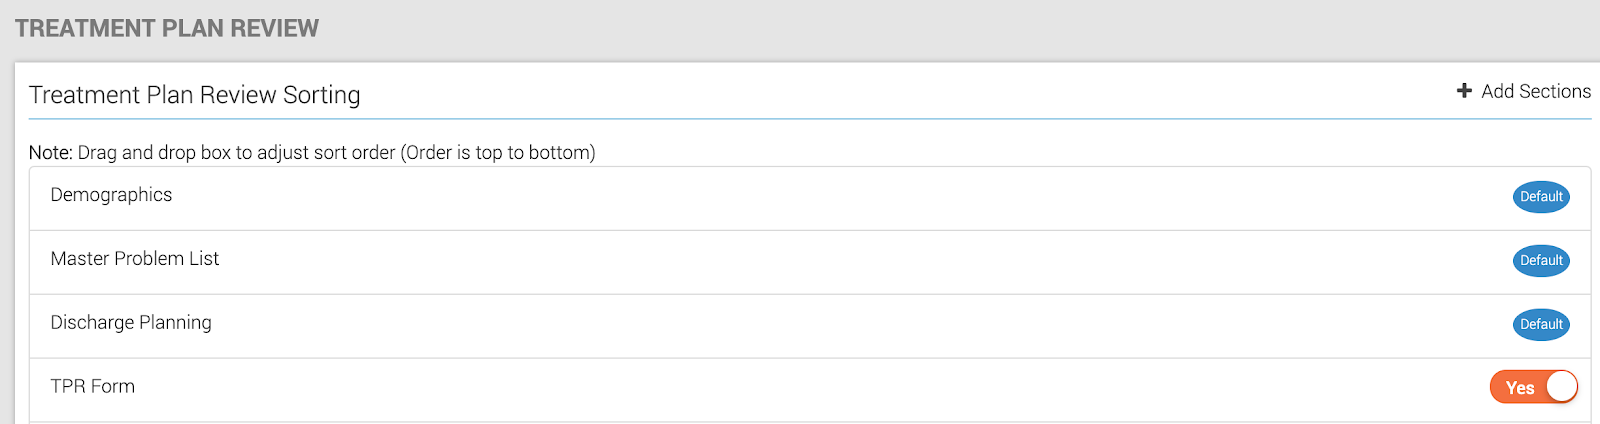
Steps to create a custom TPR:
Settings>Manage TPR
Reorder Cards
Add Custom Sections ( Click “+ Add Section”)
Forms must be built in Forms Manager 2.0 with the Treatment Plan Review Form designation to be eligible to be added
Click Save
Custom sections will save and populate forward to any new TPR created in the future.
Snapshot BPS - To meet increasing compliance standards we have created a versioning record of changes to your biopsychosocial document. Each time the BPS is signed it will create a downloadable PDF snapshot of the BPS at that moment. Amendments or formatting changes can now be reconciled with past BPS snapshots. Versions available will be listed at the top of the BPS.

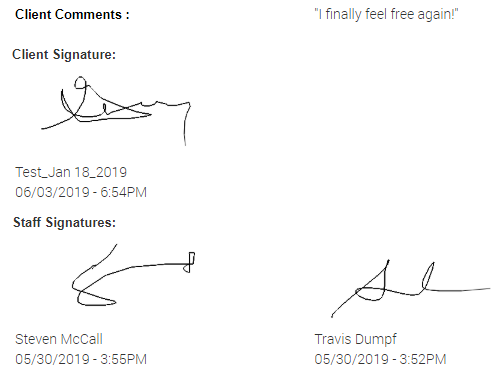
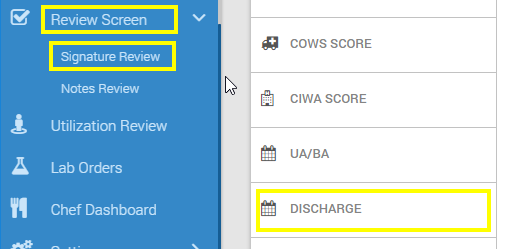
Discharge Summary Signatures - Discharge Summary can now have staff, client, and parent/guardian signature, as well as assigned reviewers. Summaries assigned to you will show up in your Signature Review screen on the left side blue menu.
Additional Level of Cares Added- We’ve added the following options to our Level of Care options:
IOP-3
IOP-5
IRP (Phase 1)
SRP (Phase 2)
Sober Living
**For questions, clarification, or further training, please contact support@allevasoft.com.
