![Untitled design (2)-3.png]](https://support.helloalleva.com/hs-fs/hubfs/Untitled%20design%20(2)-3.png?height=50&name=Untitled%20design%20(2)-3.png)
In order to create a Progress Note, follow these steps:
1. Hover over the Purple Plus Sign shortcut button in the bottom right corner of any screen and select "Progress Notes".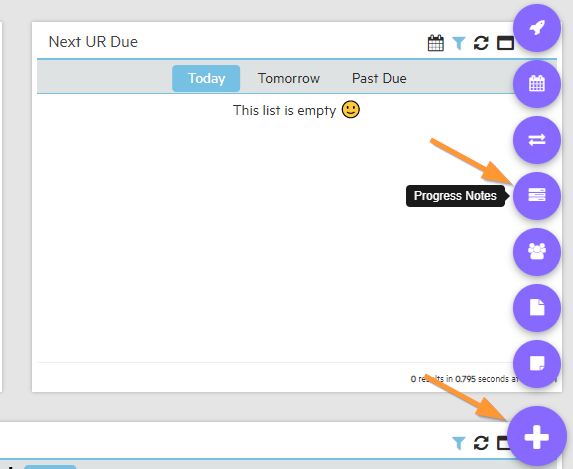
2. Search by client name and click "+Select" on the appropriate client.

3. Select the type of note. Some note types are "Billable", meaning they are tied to a billable session in the calendar. Other note types are "Progress Notes" that are not billable. These note types are controlled in System Settings > Master Drop Downs > Individual/Progress Notes and can be changed by admins at your program. 
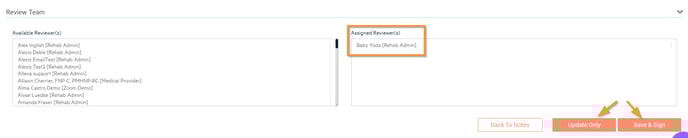
4. Write your note and add any reviewers (other staff who need to sign off on this note) if necessary. If there is a reviewer added, the note will populate in their "My Tasks" list on their dashboard to review and sign. Select "Save and Sign" to finish the note by signing, or if the note is still in progress, select "Update Only".
Done!
You can also add a Progress Note via the client chart > Notes screen. From the client's notes screen, select "Add New" in the upper right corner and then select "Progress Note" from the drop down.
1. Go to client chart > Notes.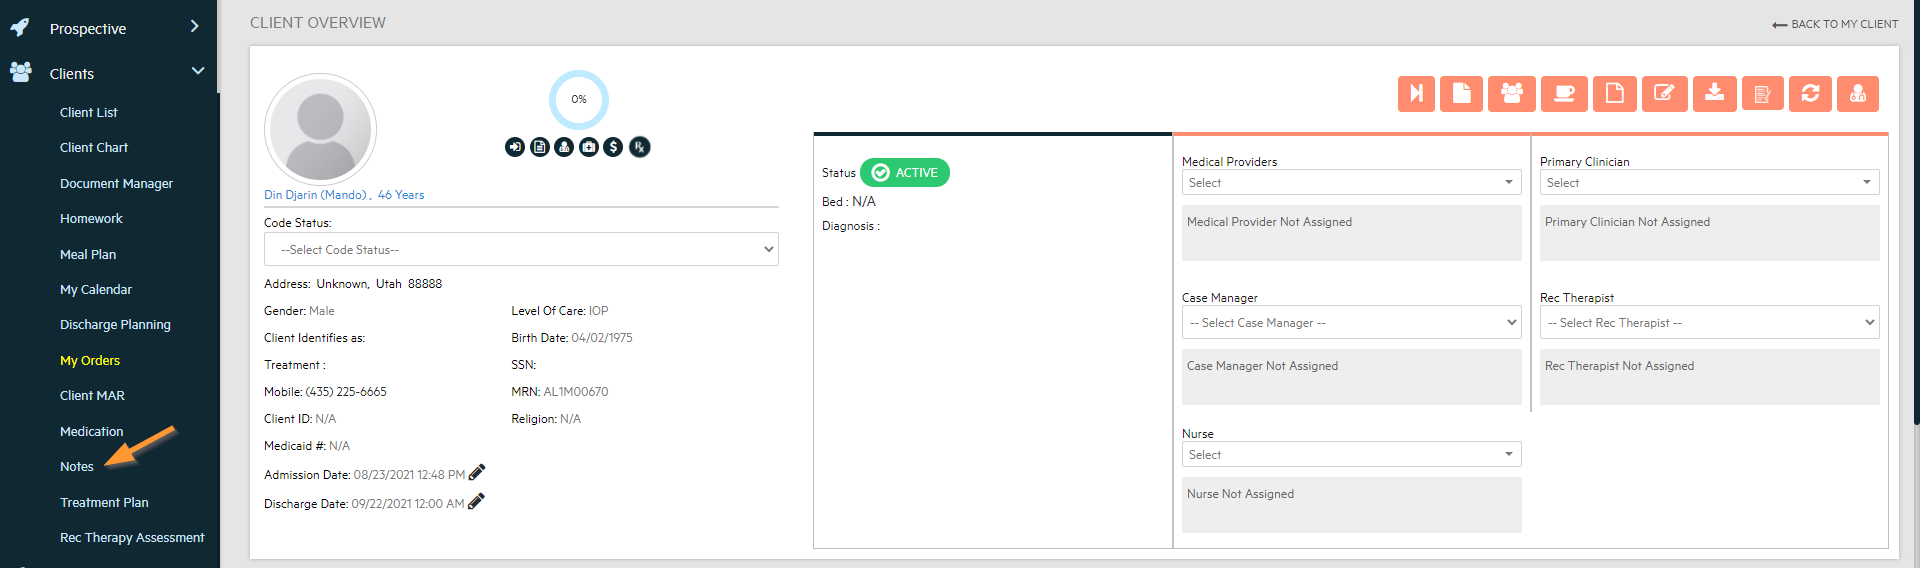
2. Select "Add New", then select "Progress Note".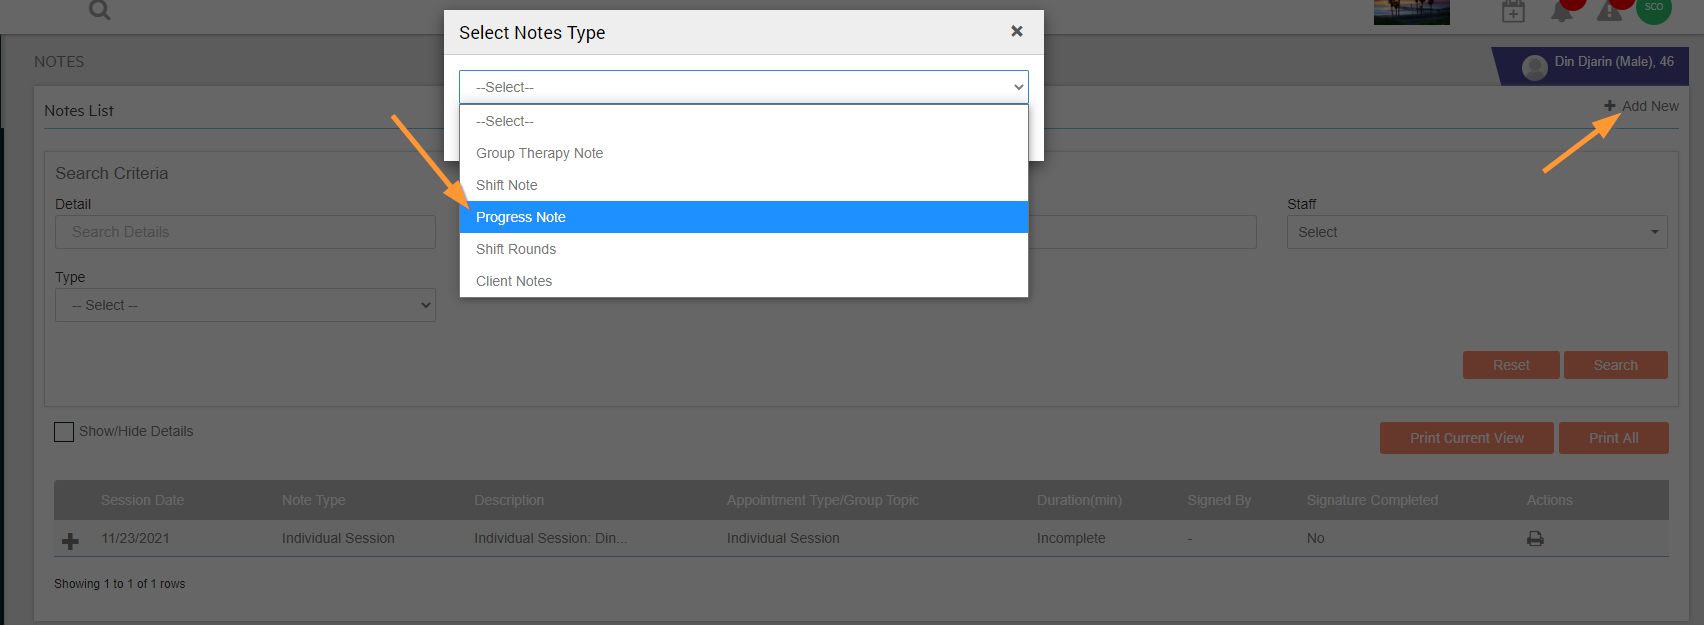
Done! All Progress Notes are stored in the client's chart in their Notes tab.