Creating Lab Orders
Creating Lab Orders within Alleva is a useful feature that you can take advantage of. This article will show the process of creating a Lab order within the EMR.
**Lab Orders require a Lab Integration if you haven't integrated with a lab yet, be sure to reach out to support@helloalleva.com**
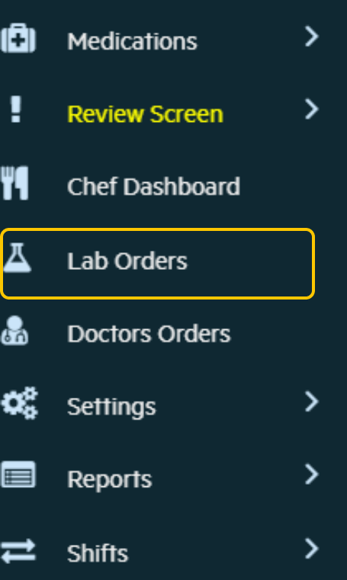
Navigate to Lab Orders
- From the menu on the left side, select Lab orders

Create a new order
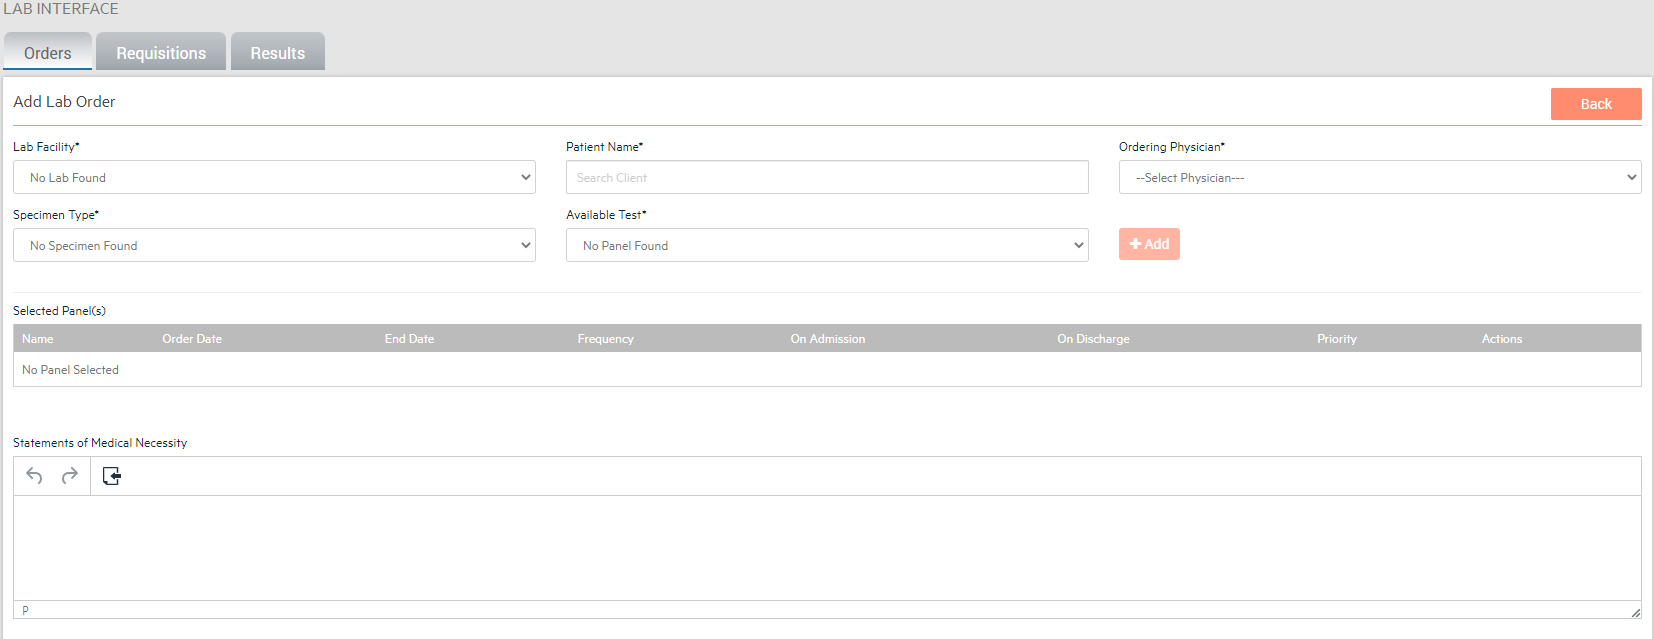
- Click the +Create button in the Orders tab. This will bring you to the section that allows you to generate a new Lab order.

Add Lab order information
- Fill out the Required fields: Lab Facility, Patient Name, Ordering Physician, Specimen Type, Available Test
- Once the Require fields have been selected, click the +add button
- You will also want to fill out the Statements of Medical Necessity field

Add the Review Team
- When you select the Ordering Physician, they will automatically be entered as an assigned reviewer. Determine if there is are any other reviewers needed, add them in the Review team section.

Sign and Save
- Once all the fields have been completed select the Save & Sign button and follow the Sign Prompts to finish creating the Lab Order!
Create a Requisition
- Navigate to the "Requisition" tab of the Lab Interface
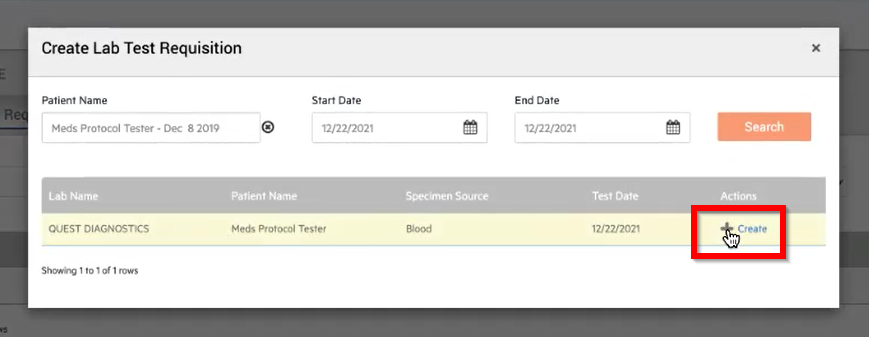
- Select the "+Create" button

- A window will appear with your newly created order. Select the "+Create" button under the Actions Column

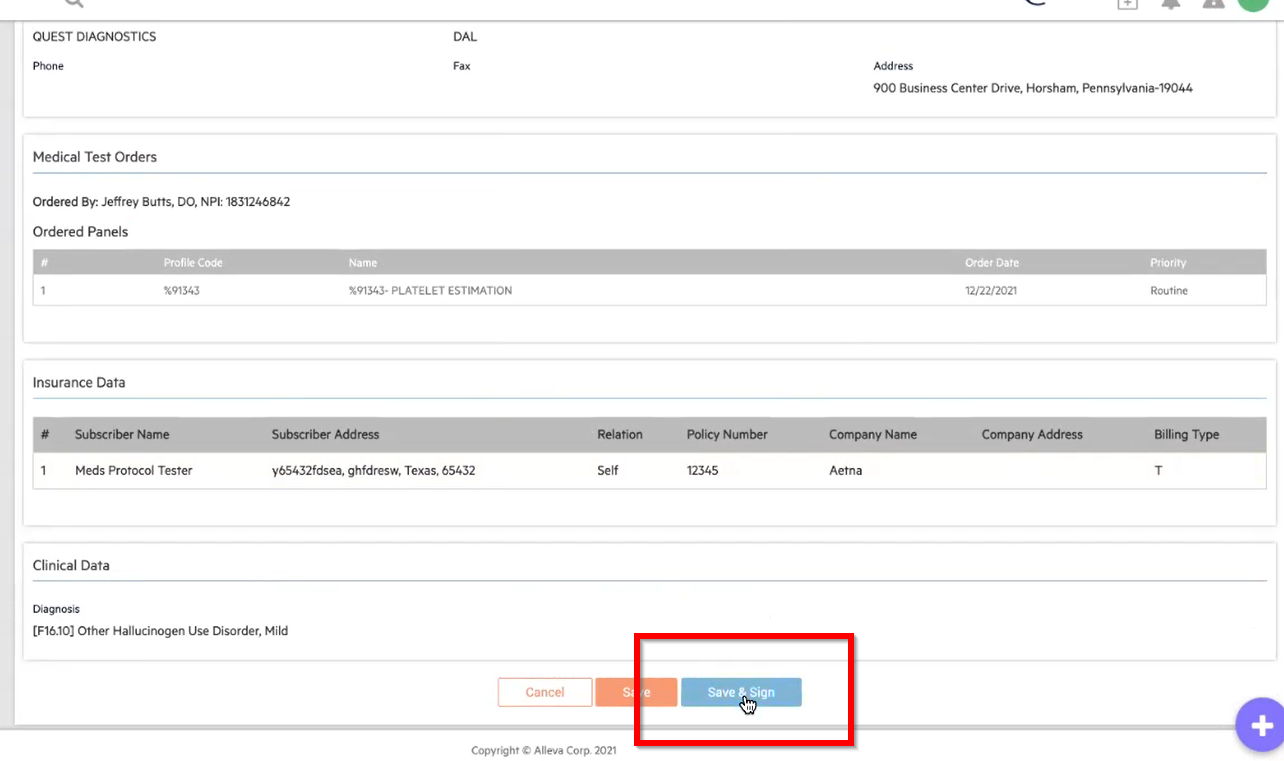
- A page will appear asking for additional information on the order. After filling all required information, select Save & Sign at the bottom of the page

Once your order has been received and processes, the results will show up in the "Results" tab of the Lab Interface.

![Untitled design (2)-3.png]](https://support.helloalleva.com/hs-fs/hubfs/Untitled%20design%20(2)-3.png?height=50&name=Untitled%20design%20(2)-3.png)