![Untitled design (2)-3.png]](https://support.helloalleva.com/hs-fs/hubfs/Untitled%20design%20(2)-3.png?height=50&name=Untitled%20design%20(2)-3.png)
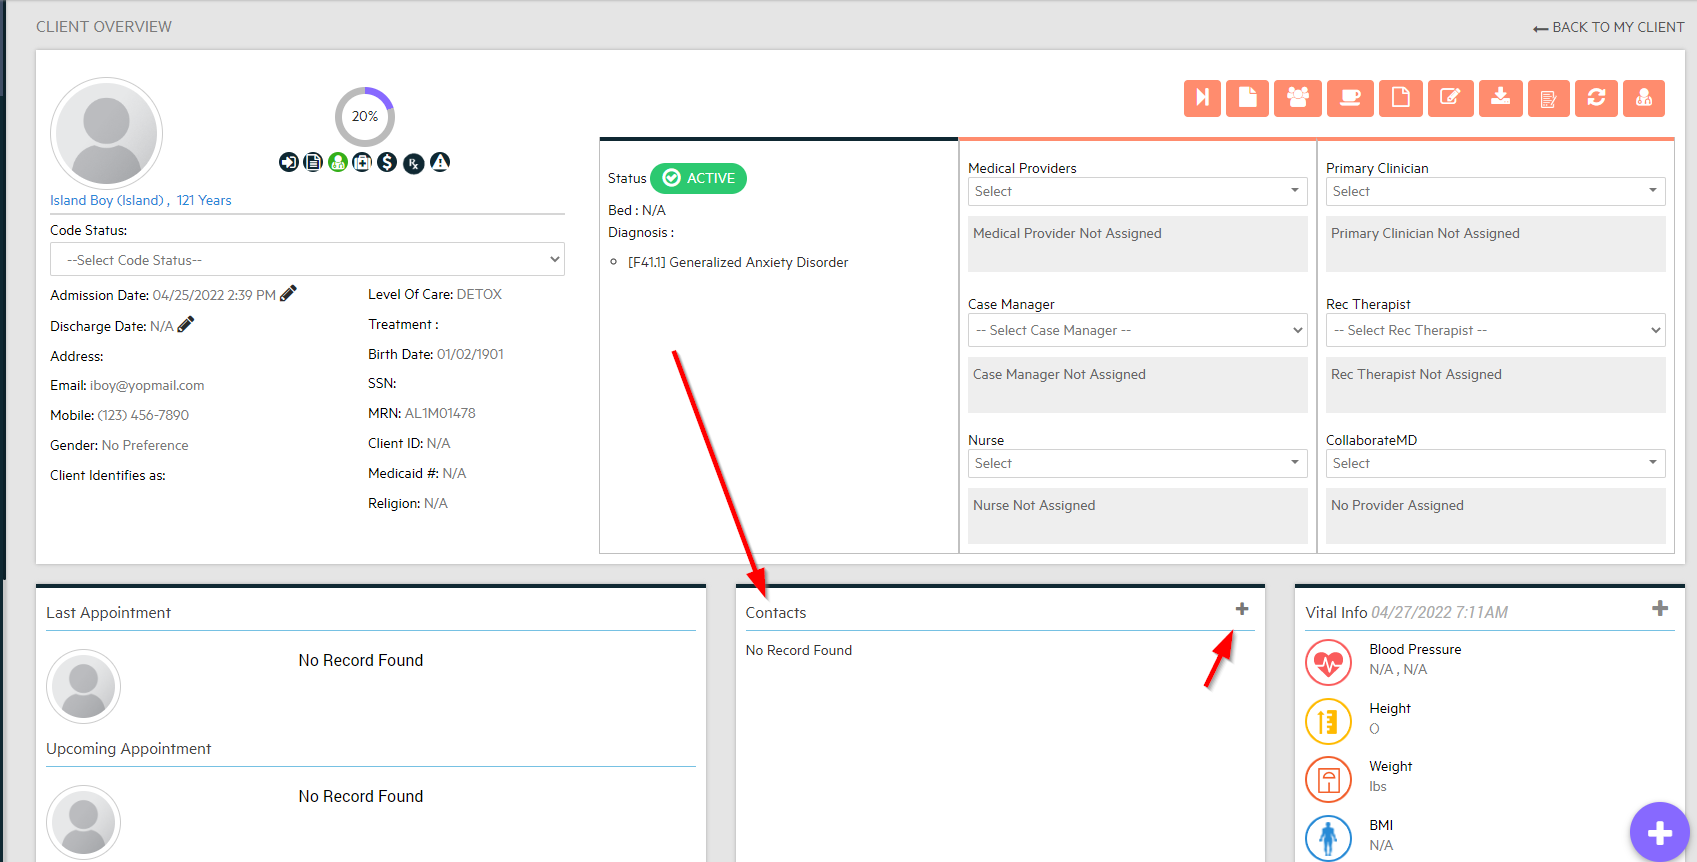
1. Start by going to the client's Chart and selecting the plus sign in the "Contacts" box.
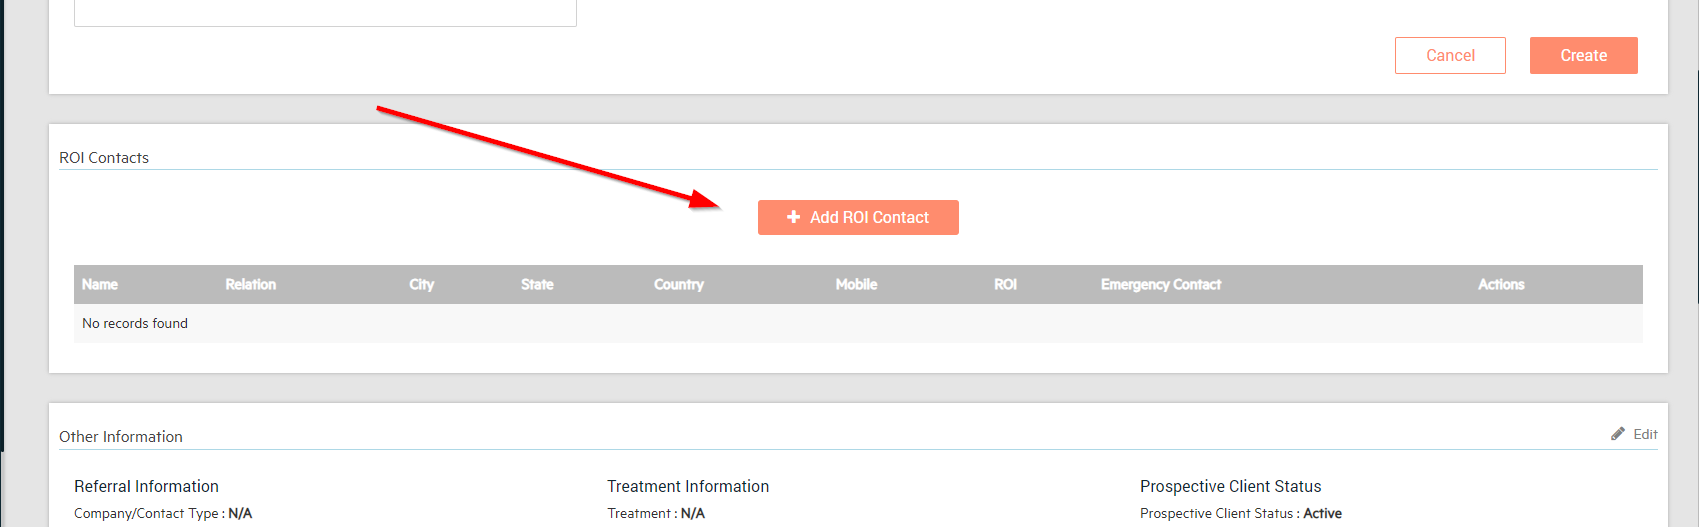
2. Scroll Down to ROI Contacts and select the orange "+Add ROI Contact".
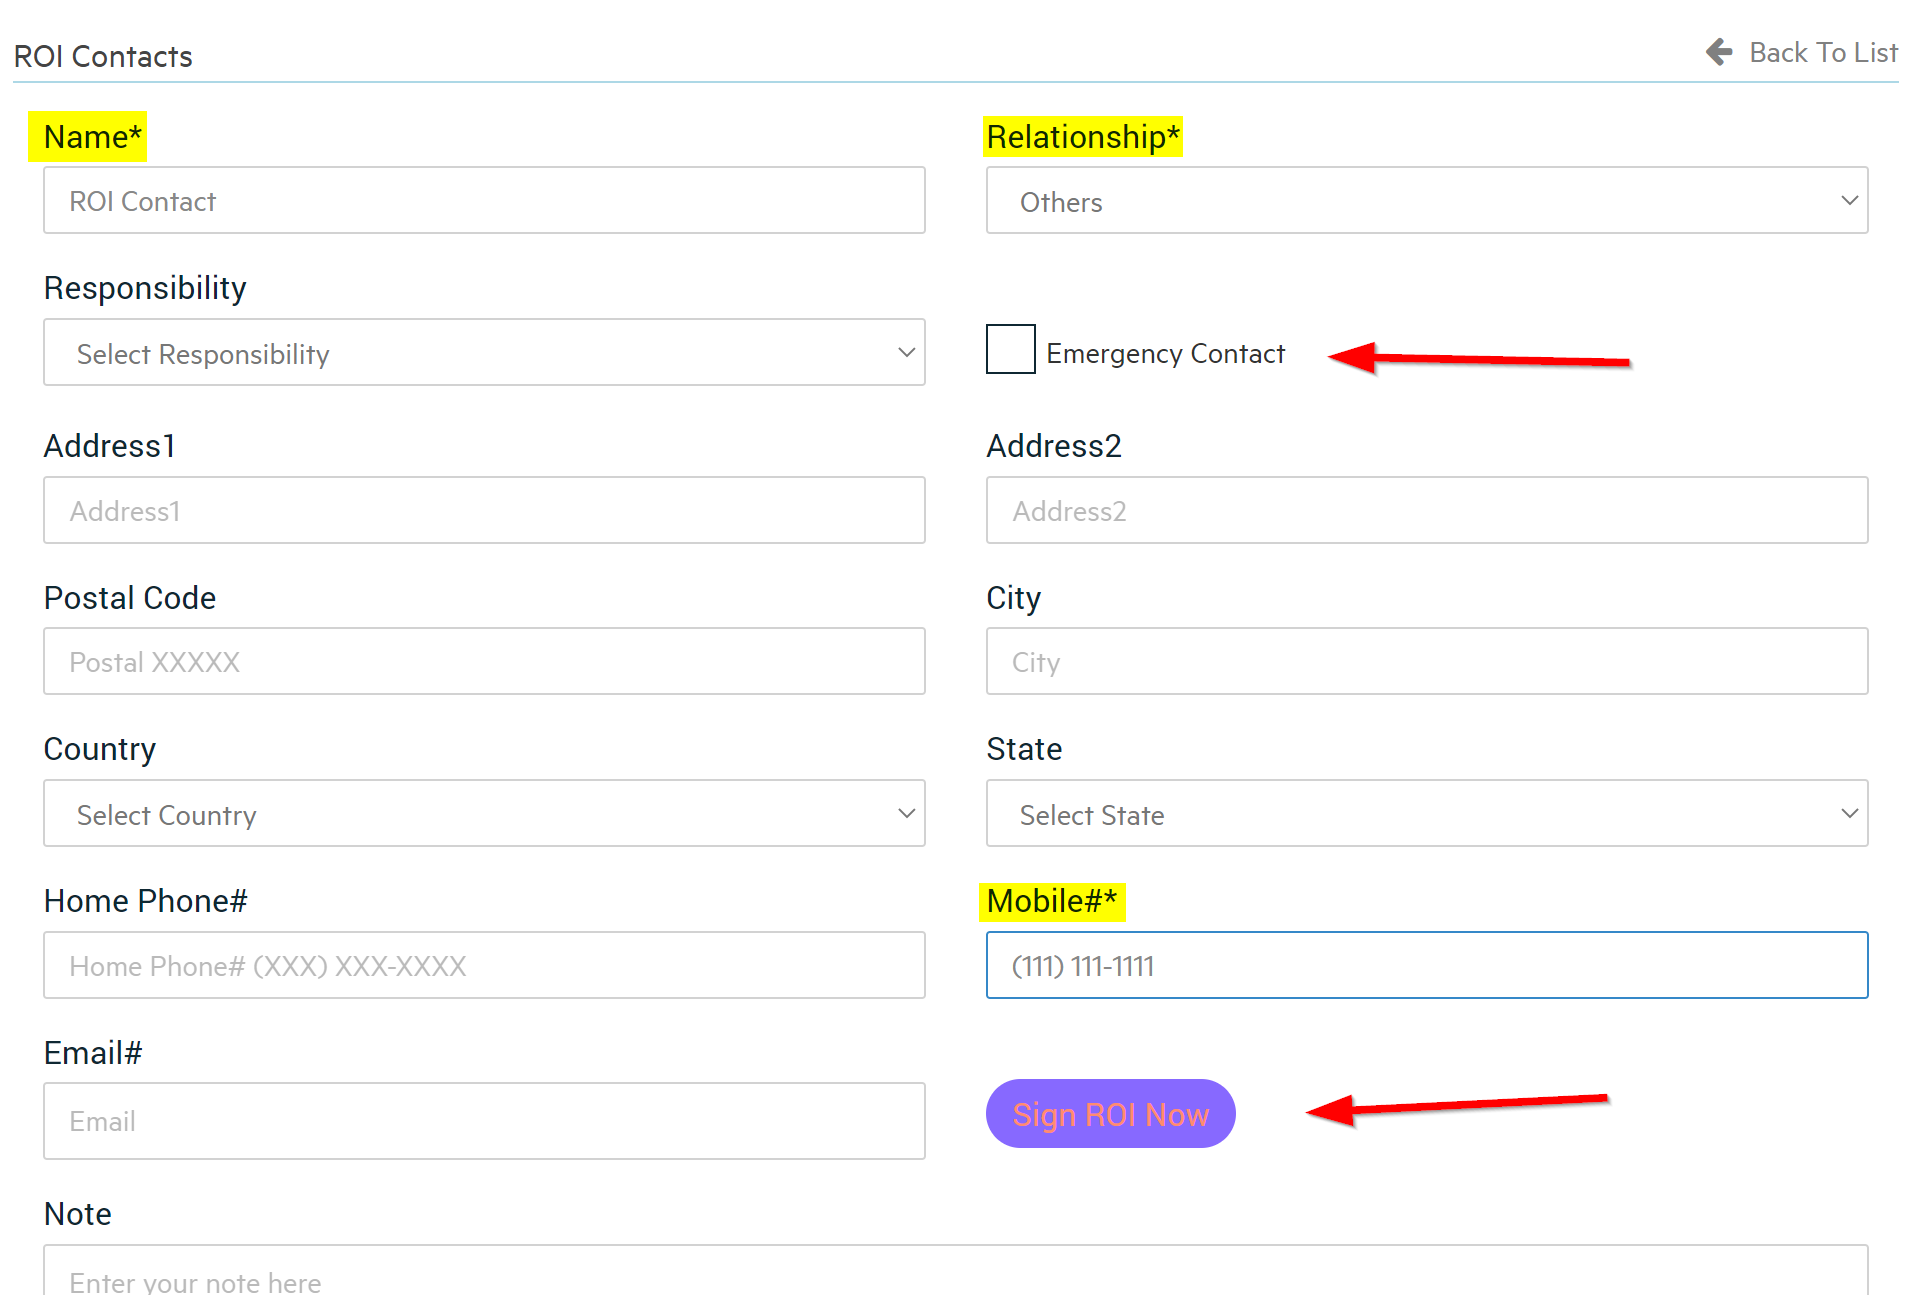
3. Add the name, relationship, mobile phone number, which are all required. You can mark them as an Emergency Contact and/or sign an ROI at this time by selecting "Sign ROI Now."
Below is the ROI form that you will fill out with the client.
NOTE: While the ROI is open, the rest of the screen will black out and the client will not be able to exit and see the rest of the EMR while they fill out this form. Your Alleva password will be required to exit this form.
1. Enter the start and end date that the ROI will be active between.
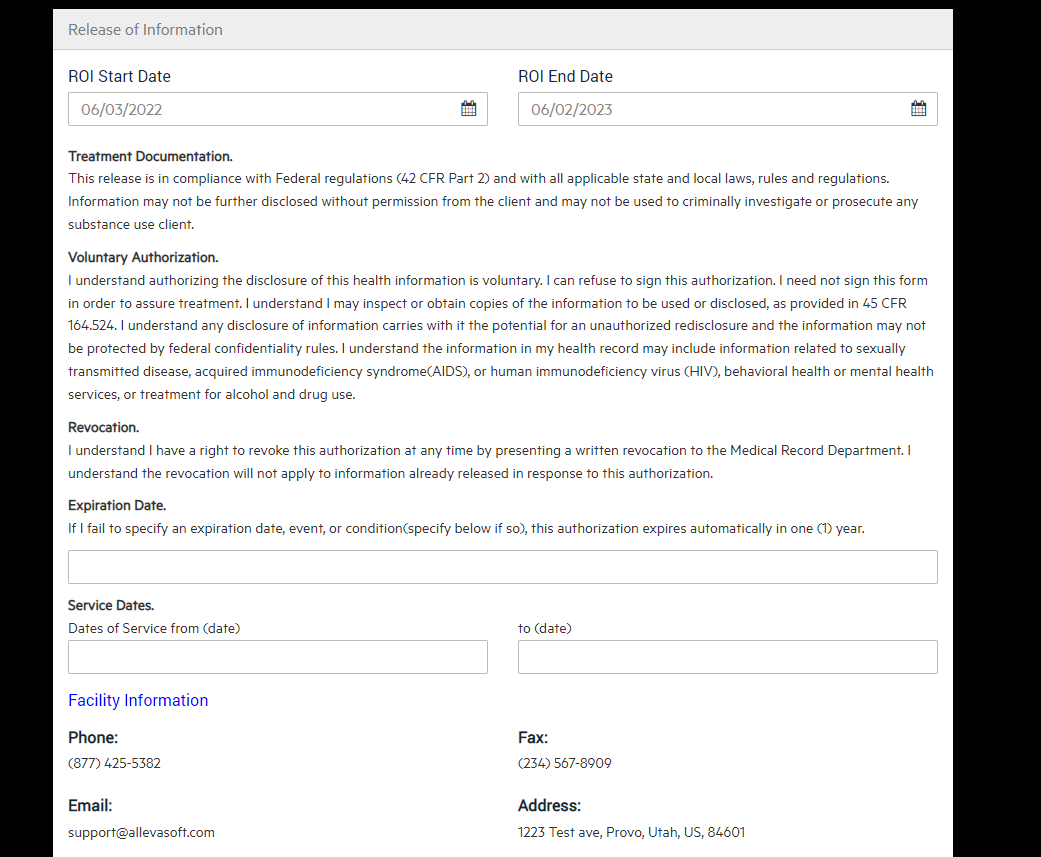
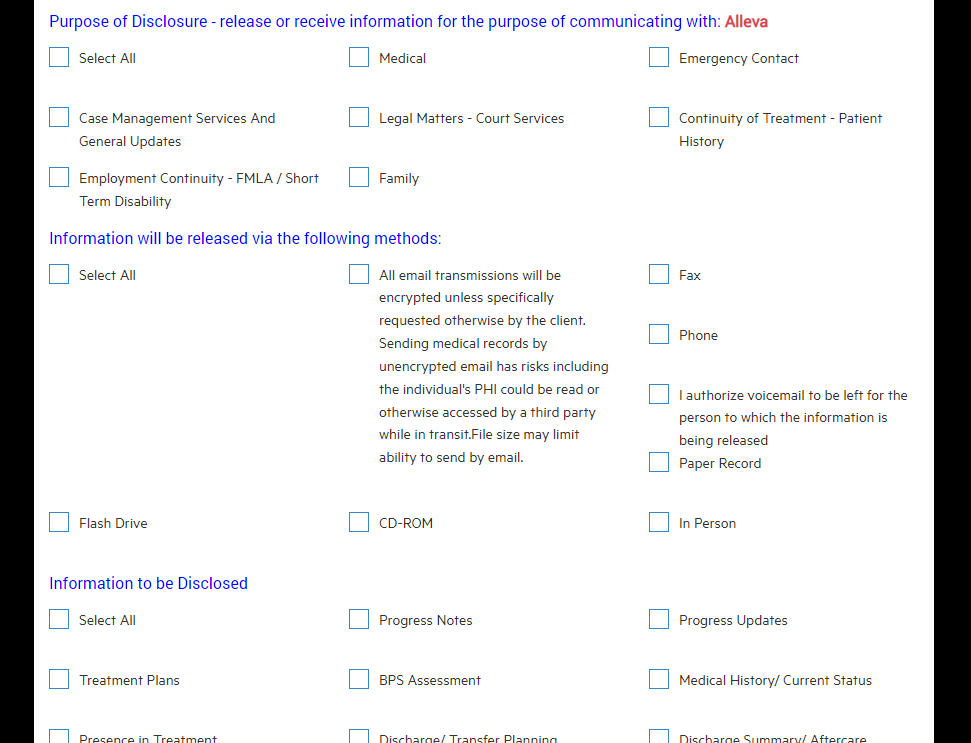
2. Select why the information can be released, how it can be released, and what can be released.
3. Add signatures to the document and then enter your password to Unlock & Save the Release Form.
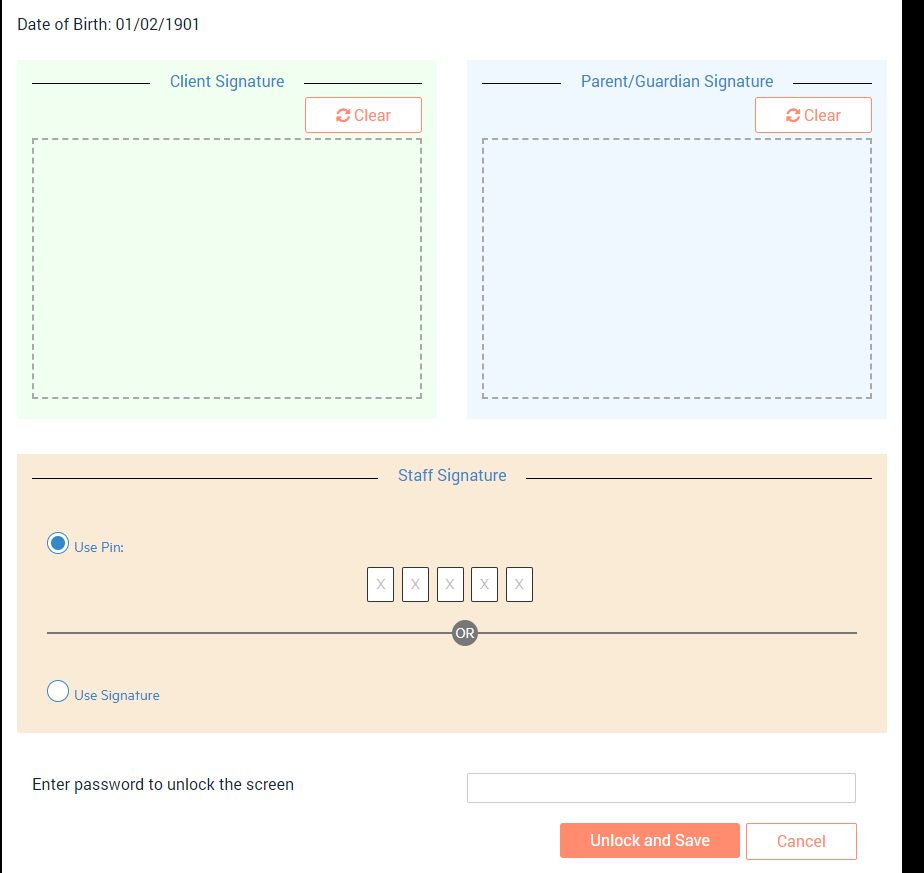
Once you enter your password and click "Unlock and Save", the system will bring you back to the Face to Face where you can view and the Contact and ROI at a later date. **Note: if changes are needed to the release of information, you must first Revoke the existing ROI and fill out and have the client sign a new ROI for compliance and security purposes.

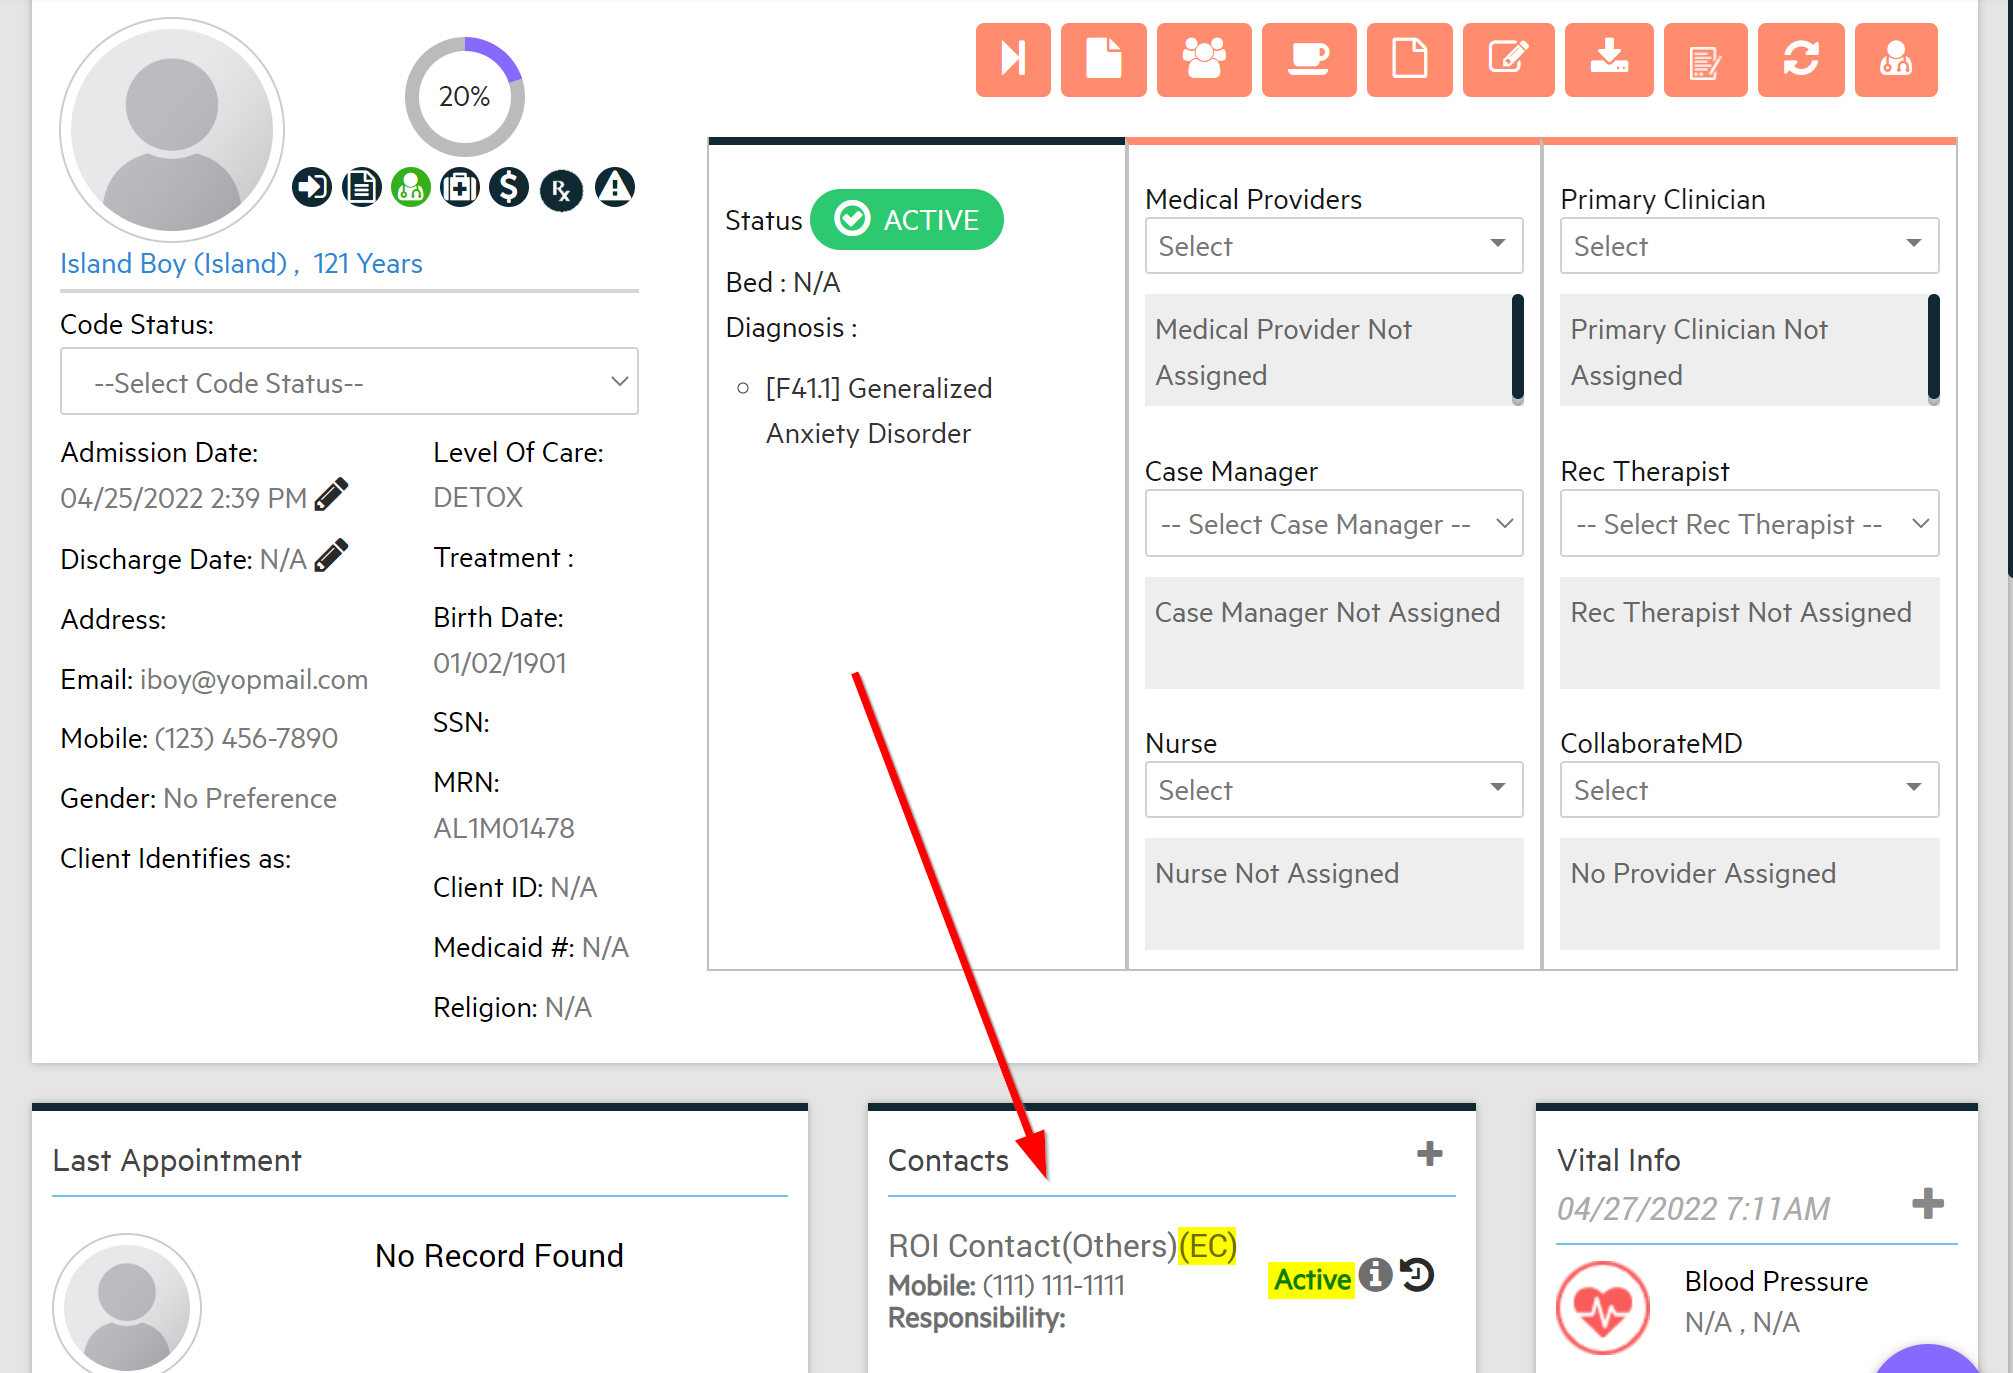
When you go back to the client Chart, you'll see the contact listed under "Contacts" with their name, phone number, relationship, and (EC) will appear next to their name if they're an Emergency Contact. It will also say "Active" if the current date is within the active dates of the ROI. You can click on the curved arrow to open their ROI form from this screen to review that information.
TIP: If changes are needed to the information the contact can access, revoke the existing ROI and then create a new ROI and have the client re-sign it. To revoke an ROI, click “Active” and select “Revoke ROI.”